Last updated: October 24, 2026
A stamped concrete patio on a slope works best when the design solves the grade first and the pattern second. For sloped backyards, the quick answer is that 1 or more level patio sections, steps, and drainage usually make the layout usable. In a sloped backyard patio design, the smartest move is usually to create level patio sections, then connect them with steps, short retaining wall blocks, and drainage that keeps water from running across the finished surface. This guide focuses on Stamped Concrete Patio Design Ideas for Sloped Backyards, because the slope changes the layout before the pattern ever matters.
The design choice that matters most on a slope
The right stamped concrete patio design for a slope is the one that controls elevation changes without turning the yard into a staircase. That usually means one of three layouts: a single elevated pad with a retaining edge, a two-level terrace, or a larger terraced system with a landing between levels.
A flat-looking patio in a sloped yard is rarely truly flat from property edge to property edge. The practical goal is to give the patio a level surface where people sit, grill, and walk, then use the slope somewhere else on the site for runoff and access. If the grade change is modest, a patio can sometimes step down 6 to 8 inches at a time with a wide landing. If the slope is sharper, the patio may need multiple platforms instead of one big slab.
This is where generic patio advice misses the point. On level ground, layout is mostly about shape and traffic flow. On a slope, the layout is a structural decision. Every change in elevation affects the footing depth, wall height, drainage path, and where the steps land. A stamped pattern does not fix a bad grade plan.
For readers comparing options, this page sits under the larger stamped concrete patio design decisions guide, which covers broader style choices. Here, the focus stays on sloped backyard patio design and the layout moves that make it work.
How do you design a stamped concrete patio on a slope?
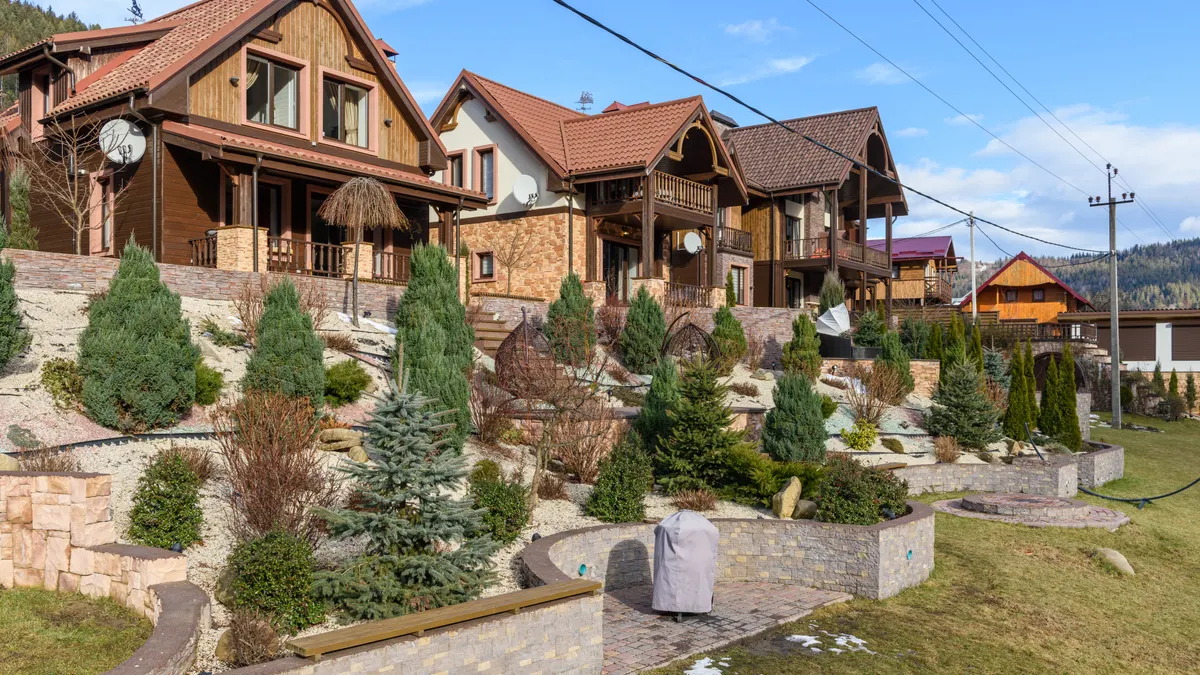
You design a stamped concrete patio on a slope by building level zones, placing steps where the grade naturally changes, and keeping water moving away from the slab. The slope itself should shape the patio, not fight it.
A simple planning sequence helps:
- Mark the high point and low point of the intended patio area. A line level, laser level, or builder’s level shows how much elevation change the yard has across the footprint.
- Decide where people will enter the patio. The best step location is usually the most natural path from the house, a deck, or a side yard gate.
- Divide the patio into one or more level sections. A single section works for gentle slopes; steeper yards often need 2 terraces with a landing between them.
- Place retaining wall blocks at any cut edge that must hold back soil. The wall should support the grade above it, not just trim the patio edge.
- Plan drainage swales or slope lines so runoff bypasses the slab instead of pooling behind a wall or washing across the surface.
- Set the step rise and run so the transition feels comfortable. Most residential steps are built in even rises; awkward custom heights are a common design mistake.
- Keep furniture zones on the flattest surfaces. A grill, dining set, or fire pit needs a stable plane more than it needs a fancy shape.
A good design usually uses the slope to create interest. A short wall can double as casual seating if it is built at a suitable height. A landing can break up a long stair run. A curved edge can soften the hard lines created by terracing. The pattern choice — slate, wood plank, ashlar, or large-format texture — comes after the grade plan is settled.
The mistake to avoid is forcing one oversized slab across a steep yard. That often leads to tall exposed edges, awkward stairs, and a patio that looks perched rather than integrated.
Terracing turns a steep yard into usable outdoor rooms
Terracing is often the cleanest way to make a sloped backyard feel intentional, because it breaks one difficult grade into 2 or 3 usable spaces. Instead of one deep excavation and one tall wall, the design uses shorter retaining walls blocks, smaller cuts, and separate level pads.
A terrace can do more than solve the slope. It can also organize the yard. One level might hold the dining table, the next a fire pit, and a lower strip a planting bed or path. That separation matters in small yards, where a single oversized patio can overwhelm the lot.
The main trade-off is cost and complexity. More terraces mean more walls, more steps, and more detail work at the joints. The reward is that each level can be built to a different purpose. A 12-inch height change is often enough to define a space without making it feel chopped up. In stronger grades, a two-step rise with a landing can make the yard feel deliberate instead of constrained.
Retaining walls must be sized and detailed for the load they carry. A short decorative edge is not the same thing as a structural wall that holds back hillside soil. Drainage behind the wall matters just as much as the visible finish. Without it, trapped water can push on the wall and stain or crack the patio above it.
For many sloped yards, terracing also reduces the amount of exposed concrete edge that would otherwise be visible from the lawn. That improves the look of stamped finishes, because the eye sees level planes and clean transitions instead of one long tilted slab.
This is the right approach when the yard has a noticeable pitch but still offers enough width for separate zones. It is not always the right choice when the slope is so tight that every terrace would become a narrow strip. In that case, a smaller patio with a stronger connection to steps and a path usually works better.
Steps, landings, and footings: where the transition should happen
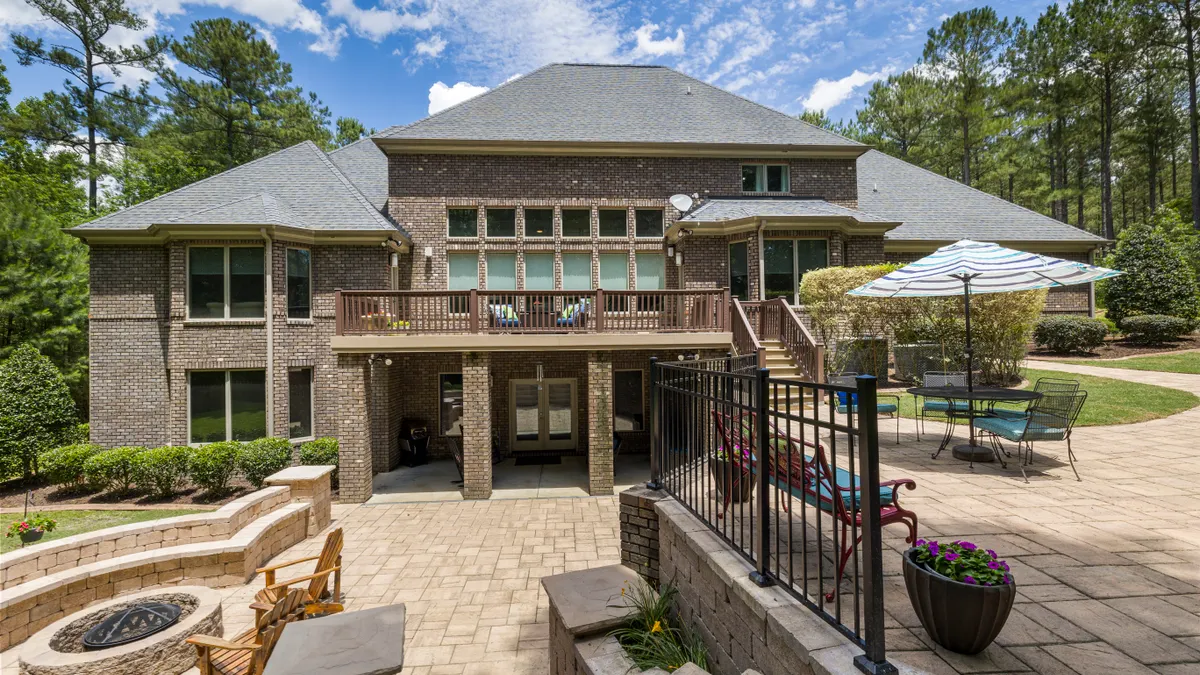
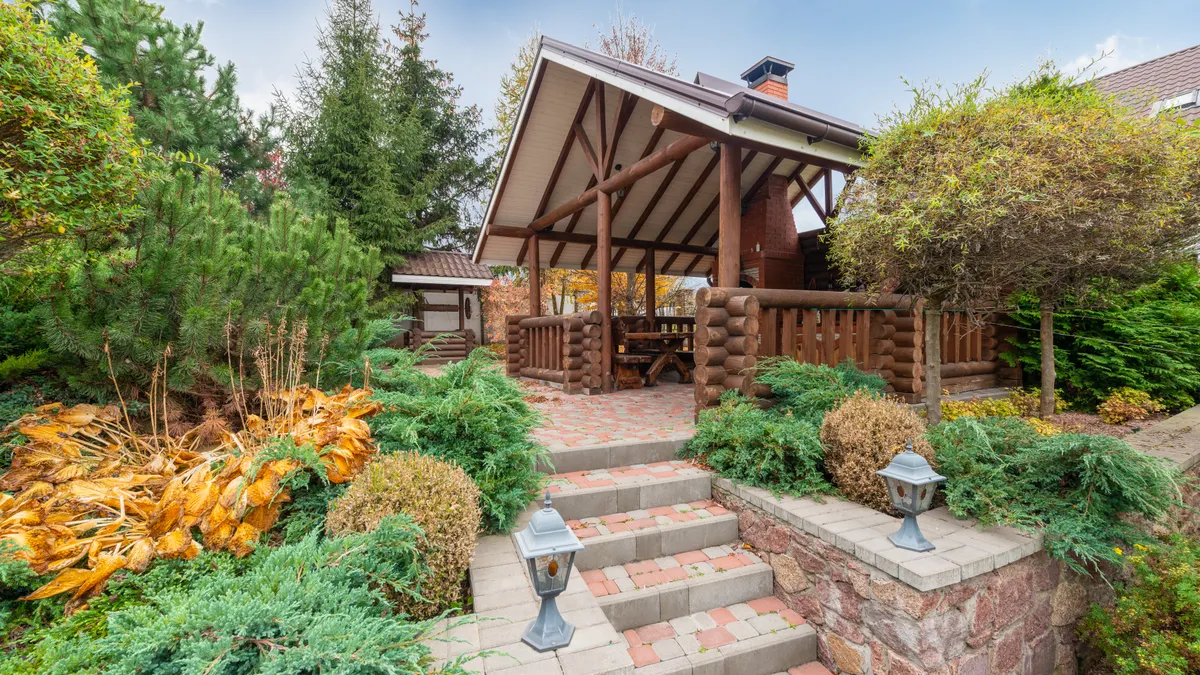
Steps belong where the body naturally changes direction, and landings belong wherever a long run would feel awkward or unsafe. On a sloped backyard patio design, that usually means at the house threshold, between terraces, or at the point where the patio meets a lawn path.
A good step layout feels obvious. The eye can read it in one glance, and the feet land where expected. A bad layout hides the change in grade until the last second, which is how patios become annoying to use. Keep step treads wide enough to carry a person comfortably and avoid changing rise heights within the same run. Even small inconsistencies stand out on concrete.
Footings are the quiet part of this design, but they decide whether the structure lasts. Any retaining wall or stepped condition that holds soil needs proper support below grade. The footing depth and width depend on wall height, soil conditions, and local frost line, so this is one place where a contractor should not guess. A wall that shifts even slightly can crack the patio edge above it.
A landing is more than a pause between steps. It gives the slope a place to break, which makes the whole yard feel less steep. It can also serve as a transition from one stamped pattern zone to another. For example, a broad landing can shift from a slate texture near the house to a smoother finish near the garden side without making the patio feel disjointed.
If the slope is mild, one short flight of steps may be enough. If it is stronger, 2 shorter runs with a landing often look better and feel safer than one long descent. That layout also gives the installer a better chance to control drainage around each level.
Drainage on slopes keeps the patio usable after hard rain
Drainage on slopes is not optional, because water always takes the easiest path and a concrete patio can become that path if the grade is wrong. The design should move runoff around the patio, not across the sitting area or behind a retaining wall.
Drainage swales are one of the simplest ways to do that. A shallow swale can redirect water along the edge of the patio and away from doors, steps, and wall bases. On a sloped yard, a swale may be more useful than trying to force all runoff into one drain. The shape depends on the site, but the purpose stays the same: keep water from collecting where people walk.
A patio on a slope should also have a slight surface pitch for shedding water, even if the overall feel is level. The key is to balance comfort with drainage. Water should not pond on a patio section, but the grade should not be so noticeable that chairs wobble or dishes slide. That balance is one reason sloped patios often work better as multiple level sections rather than one large slab.
Where the patio meets a retaining wall, drainage detail matters even more. Water trapped behind the wall can stain the concrete, loosen bedding material, or push against the wall face. Downspouts, site runoff, and uphill water should all be considered before the patio shape is finalized. If the yard collects water from a neighbor’s slope or a higher portion of the property, the drainage plan needs to deal with that upstream flow too.
A common design error is to place the patio where the yard looks flattest on the surface without checking where water actually runs after a storm. The patio may look fine for a week and then show puddling, erosion at the edges, or dampness behind the wall.
What a bad sloped patio design looks like
A bad sloped patio design usually shows itself through awkward steps, overbuilt walls, and water problems that appear after the first heavy rain. It may look finished on day one and still be wrong.
The most common warning signs are easy to spot:
- One long, steep stair run with no landing, which makes the grade feel harsher than it needs to.
- A retaining wall that looks decorative but is clearly holding back more soil than it should.
- Patio edges that sit too high above the lawn, creating a drop that feels exposed and hard to mow around.
- Drainage swales ignored in favor of a flat-looking surface, which often means water heads straight toward the patio.
- Level sections that are too small to use, leaving furniture squeezed into a corner.
- Pattern choices that fight the slope, such as a busy stamp layout competing with too many elevation changes.
The cost of these mistakes is not just appearance. Bad grade planning can mean rework, poor drainage, cracked edges, and a patio that nobody wants to use. In many cases, fixing the layout later is far more expensive than getting the terrace plan right before any concrete is poured.
This is also where a stamped surface can be misleading. A texture and color release may look attractive, but they do not hide a poor transition from one level to the next. On a slope, form follows function first.
If a contractor proposes one broad slab without talking about drainage, footings, wall support, or step placement, that is a warning sign. A proper sloped backyard patio design should be able to explain how each elevation change is handled.
What to ask a contractor before you commit
You should ask how the patio will handle grade change, drainage, and wall support before you sign anything. Those three answers tell you whether the design is built for a slope or just adapted to one.
Ask direct questions:
- How many level patio sections are planned?
- Where will the steps land, and how many risers are in each run?
- Will retaining wall blocks be structural or decorative?
- How will drainage swales move water around the patio?
- What footing details are needed for the wall and stepped sections?
- How will the patio edge meet the lawn so mowing and access stay practical?
You should also ask whether the design depends on a large cut into the hillside or on filling a low area. A cut-and-retain approach and a fill-and-support approach are very different jobs. That difference affects time, material, and how much of the slope stays visible after the patio is built.
For scheduling, a sloped project often takes longer than a flat one because the layout has more transitions. Even a straightforward terrace plan can require extra site shaping, wall construction, and step forming before the stamped surface is placed. A contractor should be able to explain which parts of the job take the most time and why.
The right design is the one that makes the yard easier to use, not just prettier. If the slope is modest, a single patio with one short step might be enough. If the backyard is steeper, terracing with landings and wall support is usually the more honest solution. That is the choice worth making.
Key Takeaways
- On a slope, the layout has to solve grade first and style second.
- Level patio sections, not one oversized slab, often give the best result in a backyard with real elevation change.
- Steps should follow natural movement paths, and landings make steeper transitions feel deliberate.
- Retaining wall blocks, footings, and drainage swales are structural choices, not add-ons.
- A patio that ignores runoff, wall support, or step placement may look finished but still fail the job.
Can you install a stamped concrete patio on a slope?
Yes, a stamped concrete patio can be installed on a slope if the design controls the grade with terraces, steps, and drainage. The key is not pouring concrete over the hill but shaping the yard so the patio has level use areas and stable support. Steeper sites may need retaining wall blocks and proper footings.
How do you level a patio on a sloped yard?
You level a patio on a sloped yard by creating cut-and-fill zones or by stepping the design into separate flat sections. A single large flat pour is rarely the right answer. The patio should be built on a prepared base with the slope redirected into walls, steps, or drainage swales rather than into the sitting area.
Do sloped patios need retaining walls?
Many sloped patios do need retaining walls, especially when soil must be held back at a raised edge. A short decorative edge is not the same as a structural wall. If the patio is terraced or partially cut into the slope, retaining wall blocks and appropriate footings may be necessary to keep the design stable and dry.
Drafted with AI; not yet reviewed by a person.