Last updated: September 10, 2026
Key Takeaways
- Start by removing everything from the patio footprint plus a buffer of at least 3 feet around it.
- this is typically done through 811.
- If a plant is within 2 feet of the proposed edge, assume it may get damaged during digging and form work.
- If roots are thicker than about 2 inches, I would want the contractor to decide whether to reroute the patio edge.
Stamped concrete patio installation goes smoother when the yard is already shaped, cleared, and dry enough for a contractor to work without wrestling the site. Want the short version? Get the ground ready before the concrete truck arrives. If you want to know how to prepare your yard for stamped concrete patio installation so the finished slab sits level, drains correctly, and avoids cracks from bad subgrade work, the real job starts before the pour.
Who this is for, and what I’m assuming you already know

This is for a homeowner who has already decided on stamped concrete patio installation and now needs to get the yard ready for a contractor. I’m assuming you know roughly where you want the patio, have a general size in mind, and understand that stamped concrete is a poured slab with a decorative texture pressed into the surface before it hardens. I’m also assuming you are not trying to pour the patio yourself.
The question here is not “What is stamped concrete?” It is “What do I need to clear, measure, correct, and discuss before installation starts so I don’t create expensive problems later?” That matters because the prep work shapes the final grade, drainage, and edge lines just as much as the concrete mix does.
There are a few cases where the answer changes. If your yard is on a steep slope, if water already pools near the house, if the soil stays soft after rain, or if there are buried utilities near the patio area, I would treat this as a contractor-led project from the start rather than a simple cleanup job; consult a qualified contractor or drainage professional before moving ahead. The same is true if the patio will tie into an existing foundation, pool deck, retaining wall, or irrigation system. Those details can change excavation depth, reinforcement, and drain placement.
A good baseline is simple: the area should be accessible, marked, and free of anything that blocks layout or excavation. A bad baseline is “the yard is mostly clear, so it will be fine.” That is how you end up with a patio that looks fine on paper but throws water the wrong way. Ugly, really. Water finds the weak spot every time.
What should I clear out before stamped concrete work starts?
Clear the patio zone, the access path, and anything the crew could hit, trip over, or have to work around in the first 10 to 20 feet of the site. That includes furniture, planters, grills, toys, hose reels, dog runs, landscape lights, and any loose stone or edging material.
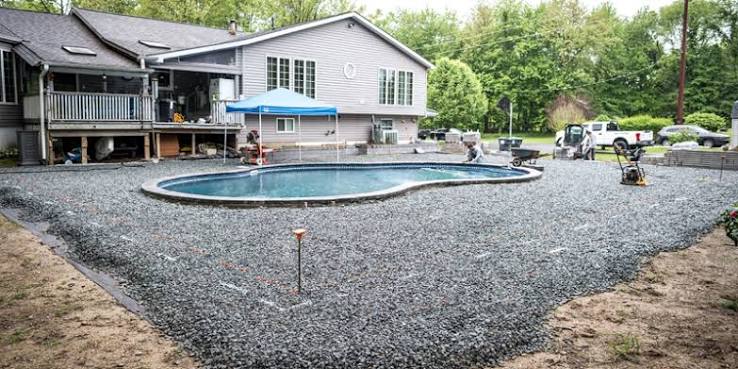
Start by removing everything from the patio footprint plus a buffer of at least 3 feet around it. Contractors need room for forms, stakes, wheelbarrows, and cutting tools. If the route from the street or driveway to the patio goes through a gate, side yard, or narrow passage, measure that opening before the crew arrives. A standard wheelbarrow needs a path that is wide enough to move safely; if the access is only 30 inches or so, tell the contractor early because material handling changes fast.
Next, cut back shrubs, vines, and low branches that hang into the work zone. If a plant is within 2 feet of the proposed edge, assume it may get damaged during digging and form work. I would move potted plants completely off-site for the day, not just out of the way. Temporary relocation is cheaper than replacing a cracked urn or a plant crushed by delivered stone.
Mark sprinkler heads, valve boxes, landscape lights, cleanouts, and drain grates with flags or paint. A contractor can work around known fixtures. Hidden fixtures are what get broken. If you have an irrigation map, print it. If you do not, turn the sprinkler system on and note every spray zone and head near the patio area.
One more thing people miss: remove anything stored against the house wall near the patio location, even if it is not technically in the work area. Concrete dust, splash, and foot traffic will reach farther than you expect.
How do I check the yard before the contractor digs?
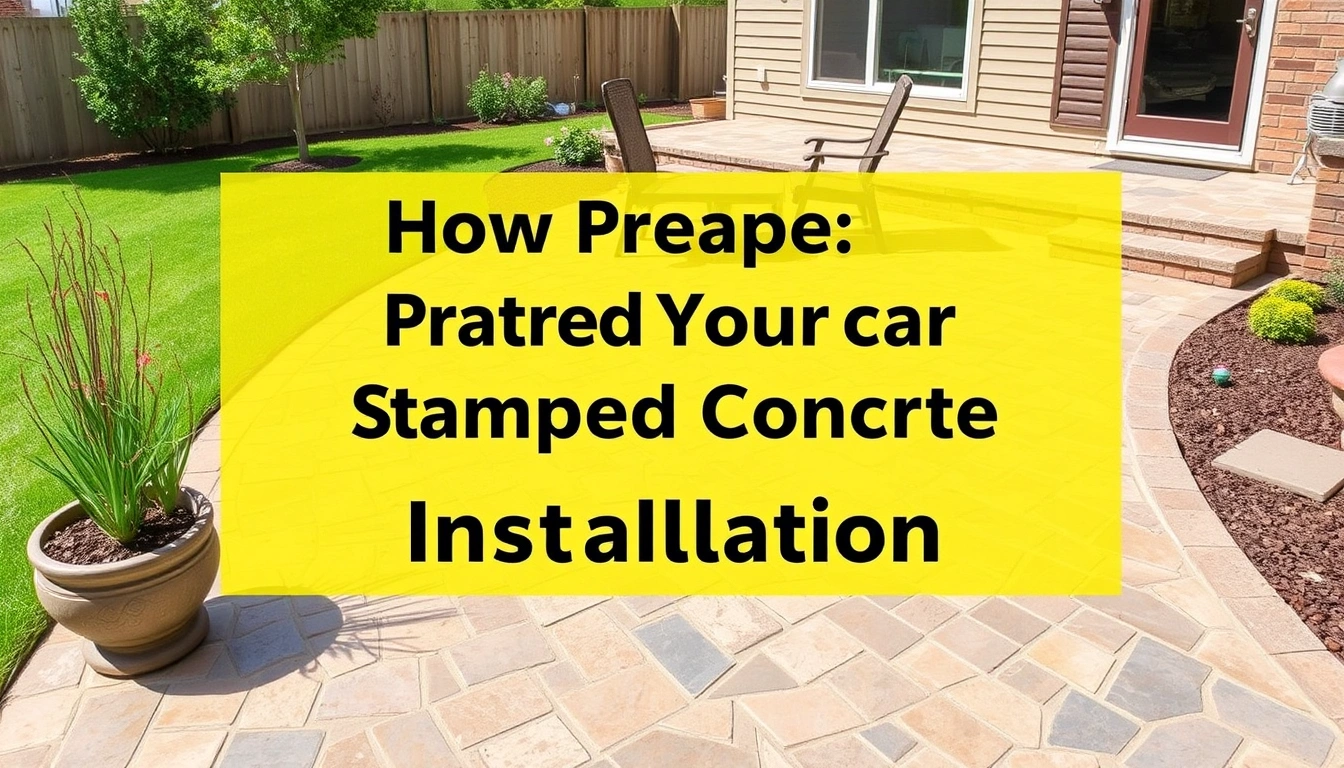
Check the grade, drainage, soil condition, and access before anyone breaks ground, and that is a core part of how to prepare your yard for stamped concrete patio installation.
Here is the sequence I would use:
- Measure the intended patio footprint with stakes and string. Set stakes at the corners and run mason’s line between them, using a tape measure to confirm each side and diagonal. Verify that the layout matches the size you discussed with the contractor. A diagonal that is off by more than an inch or two usually means the rectangle is not square.
- Check the slope away from the house. Use a 4-foot level or a laser level to see whether the yard falls away from the foundation. A common drainage target is about 1/4 inch of fall per foot, though local conditions can change the plan. Verify that water will move away from the house. If the area tilts back toward the foundation, that is a problem, not a detail.
- Locate utilities before any excavation. Call the local utility marking service before digging; in the U.S. this is typically done through 811. Verify that gas, electric, water, telecom, and sewer lines are marked in the work zone. If markings are missing or unclear, stop. Unknown utility locations are a serious strike against proceeding.
- Probe the soil condition after a rain-free day. Walk the area and press a shovel or digging bar into the top few inches. Verify that the ground is firm enough to hold shape without turning to mud. If the shovel sinks easily or the soil smears wet, the subgrade will likely need more drying time, more base material, or a different plan.
- Identify tree roots and large buried obstructions. Look for trunk flare, exposed roots, and old concrete, brick, or stump debris. Verify that the patio edge will not cut through major roots. A single root can change excavation depth and slab behavior. If roots are thicker than about 2 inches, I would want the contractor to decide whether to reroute the patio edge.
- Confirm access for tools and materials. Measure gates, side yards, steps, and turns. Verify that there is a clear route for forms, base stone, compactors, and finishing tools. If access requires carrying everything by hand over a long distance, labor time goes up and so does the chance of a rushed finish.
- Check for grade conflicts with doors, thresholds, and drains. Measure the bottom of any door threshold, nearby siding, and utility cleanouts. Verify that the finished patio will not sit too high against the house or block access to service lids. If the planned top elevation conflicts with a door sweep or step-down, the layout needs revision before excavation.
- Plan where spoil and materials will go. Decide where excavated soil, base stone, and concrete truck access will be staged. Verify that dump piles will not block drainage paths or damage lawns you want to keep. If the only staging spot is the front lawn, protection may still leave some compaction or ruts unless it is arranged carefully.
The point of this checklist is simple: a good stamped patio starts with a stable, correctly sloped base. Decorative patterning does not rescue poor prep. A slab can look perfect on day one and still hold puddles or crack if the soil underneath was soft or uneven.
How much does yard prep usually add, and what drives the cost?
Yard prep can be a small part of the total job or a major one, depending on how much digging, hauling, and correction the site needs. For a straightforward patio in an already open yard, prep is often limited to clearing, staking, minor grading, and base work. If the yard needs demolition, tree-root management, drainage correction, or access repair, prep can become one of the biggest line items.
What drives cost most is not the stamped finish itself. It is:
- how much existing material must be removed,
- whether the soil is stable,
- how much base stone is required,
- whether the crew needs to bring in equipment through narrow access,
- and whether drainage work is part of the prep.
A flat, accessible side yard is usually simpler than a backyard reached through a 36-inch gate, down steps, or across a narrow lawn. Likewise, a site with clay soil that stays wet after storms will often need more base correction than a dry, sandy lot. If the patio sits near a foundation, the contractor may also need to be more careful with elevation and water management, which affects labor.
If you are asking for quotes, ask contractors to separate these pieces: demolition, excavation, base preparation, reinforcement, forming, stamping, sealing, and any drainage or access work. That makes bids easier to compare. A lower price that hides prep inside a vague lump sum is harder to trust than a clearer estimate with named line items.
I would be cautious about any quote that sounds unusually cheap for a site with slope or drainage issues. Those are the places where shortcuts show up later as cracks, standing water, or a patio that settles unevenly. A good job is usually the one where the contractor spends time on the base, not the one that spends the least time getting there.
When should I stop prep and have the layout changed instead?
Stop and rethink the design when the site conditions make the original patio plan a bad fit.
Water already pools where the patio will go: that usually means the subgrade is too flat, too low, or draining toward the house — change the pitch or add drainage before installation, and consult a professional if you are not sure how much correction is needed.
The finished height would block a door, vent, or cleanout: that means the slab elevation conflicts with the house or utilities — revise the layout so service access stays open.
Tree roots larger than about 2 inches cross the footprint: that means excavation could damage the tree and create slab movement later — shift the patio edge or get a site-specific plan.
The soil stays soft after normal drying time: that can mean the base may not support a standard slab without extra correction — delay the work or redesign the subbase, and consult the contractor before proceeding.
Utility markings run through the patio area and cannot be shifted: that means the excavation zone is constrained — move the patio or change the shape before digging starts.
Access is too narrow for material handling: that means labor will be slower, costlier, and more prone to damage — redesign the access route or plan for hand carry and protection.
These are not small inconveniences. They are the moments where a neat-looking layout turns into a long-term maintenance problem. I would rather shrink or move a patio by 2 or 3 feet than force concrete into a site that is fighting the design.
What mistakes actually cause bad stamped concrete prep?
The biggest mistakes are boring, which is exactly why they keep happening.
-
Leaving the grade unverified. If the patio slopes the wrong way, water will collect at the slab or near the house. The fix is to measure slope before excavation and correct it, not after the concrete is in place.
-
Ignoring soft spots in the soil. A muddy or spongy area can settle after the slab cures, so the contractor should inspect it before the pour. That can lead to cracking or edge drop-off. The better alternative is to let the area dry, remove weak material, and rebuild the base, and if the area keeps moving consult the contractor about a different base plan.
-
Not marking utilities and irrigation. Broken lines add cost and delay the job. The correct move is to call the local utility marking service and flag every valve box, head, and cleanout yourself.
-
Underestimating access problems. If the crew has to squeeze through a narrow gate or carry materials a long distance, work slows and the finish can suffer. The alternative is to discuss access up front so the crew can plan equipment and labor properly.
-
Leaving roots, stumps, or debris in place. Concrete placed over buried junk can settle unevenly. The fix is to clear the site down to stable subgrade, not just the visible surface.
-
Forgetting the final height against the house. A patio set too high can trap water against siding or create an awkward step. The correct alternative is to check finished elevation against thresholds before the forms go in.
Each of these mistakes costs more to fix after pour day than before it. That is why prep is not a cleanup task. It is the part of the job that decides whether the patio will age well.
What changes in clay soil, slopes, or cold-weather climates?
These conditions change how much prep the site needs and sometimes change the whole schedule.
Clay soil holds water longer than sandy soil, so the patio base may need more drying time and better drainage planning. If the ground is sticky after rain, do not assume compaction will solve it. A compacted wet subgrade can still move later. In clay-heavy areas, the contractor may specify a thicker aggregate base, more careful drainage, or a different excavation schedule.
On a slope, the patio might need steps, a retaining edge, or more aggressive grading to keep the slab level while still shedding water away from the house. A simple rectangle is not always the right answer on a hill, and the layout may need to follow the terrain instead of forcing it. If the grade drops sharply, the project may need retaining work before the slab can be placed.
In colder climates, freeze-thaw movement matters. The patio base and drainage need to be right because water in the soil can expand when it freezes. A slab that sits in wet soil is more likely to shift over time. I would be especially careful about fall installation timing in places that get early freezes, because a half-prepared yard can turn into a mud patch fast.
If there is an existing patio or walkway to connect into, the new slab should be checked against the old elevation and movement. Old concrete may not match the new base thickness or finish height. That is where a patchwork approach fails.
How long does prep take, and what should a good handoff look like?
Prep can take a few hours for a simple, clear yard or longer when the site needs excavation, utility marking, or drainage changes. The exact timeline depends on size, access, and soil. A homeowner can usually handle clearing and marking in a day, while grading and base prep are typically the contractor’s job.
A good handoff looks like this: the patio outline is marked, the access path is open, the utilities are identified, the contractor knows about slope and drainage issues, and anything fragile has been removed. The site should not contain surprises. If the crew arrives and immediately discovers a locked gate, a hidden sprinkler head, or a muddy stretch that was never mentioned, the job slows down before it starts.
For homeowners comparing bids, that handoff is also the best time to ask whether the contractor has handled similar stamped concrete patio installation work on sloped lots, clay soil, or tight access sites. A written plan beats a guess.
What should I ask my contractor before installation day?
Ask how the contractor wants the yard staged, what measurements they need confirmed, and whether any parts of the plan should change before excavation. Ask who is responsible for utility location, who is handling base material delivery, and whether the crew expects access for a wheelbarrow, skid steer, or hand carry only. Ask if the patio will need edge forms against existing concrete, a drain line, or a step-down from the house.
If the contractor gives you a prep list, follow it closely and do not assume that “close enough” is enough. At this stage, small mistakes become concrete problems. A patio can be beautiful and still fail early if the yard was not ready for stamped concrete patio installation.
That is why the goal is not just to clean the space. The goal is to make the site predictable enough that the patio can be poured, stamped, and cured on a stable base with no avoidable surprises.
Sources
- 811 / Call Before You Dig: https://call811.com
- American Concrete Institute (ACI) 302.1R, Guide for Concrete Floor and Slab Construction: https://www.concrete.org/store/productdetail.aspx?ItemID=302108
- U.S. Department of Energy, foundation drainage guidance: https://www.energy.gov/energysaver/insulation