Last updated: September 10, 2026
Key Takeaways
- Apply it to a hidden corner and wait 5 to 10 minutes.
- Use a hose to dampen a section about 50 to 100 square feet at a time.
- Let it sit 3 to 5 minutes, but do not let it dry.
- If water sits for more than 10 to 15 minutes, it can leave mineral rings and slow drying.
A stamped concrete patio can look spotless and still get ruined by the wrong wash. Use low pressure, a mild cleaner, and a soft brush; rinse before anything dries on the surface. On a sealed decorative slab, the job is removal without scuffing the texture or dulling the sealer. So the safest move is usually a careful wash, not a brute-force pressure blast.
- Who this is for, and what I am assuming you already know
- What should I use to clean stamped concrete patio?
- How to clean it step by step without stripping the sealer
- What are the mistakes that damage stamped concrete?
- When should you stop and call it a different job?
- How much does professional cleaning usually cost, and what changes the price?
- What should I ask before I hire someone to clean it?
- How do I keep the patio clean longer without a full reseal every season?
Who this is for, and what I am assuming you already know
This is for a stamped concrete patio with a sealed decorative surface — the kind built with color hardener, release agent, or a decorative stain locked beneath a sealer. I am assuming you already know the patio is concrete, not pavers, and that you can rinse it, sweep it, and spot-check a cleaner in an out-of-the-way corner.
The slab also needs to be sound. If it is badly spalled, flaking, or already shedding sealer in sheets, cleaning will not rescue it. Then you are dealing with restoration, not routine washing. Different beast.
For a normal patio in decent shape, I’d keep the kit simple: broom, garden hose, bucket, pH-neutral cleaner or a very mild detergent, soft nylon brush, and plenty of water. A pressure washer can be used, but only with restraint. On stamped concrete, the sealer is usually the weak link, not the concrete itself.
And this is not the right approach if the patio has a topical sealer that is already soft, whitening, or peeling. It is also the wrong tool for heavy oil contamination, rust etched deep into the surface, or efflorescence that keeps coming back after cleaning. Those need a different plan, and sometimes a reseal. “Blast it clean” sounds easy; in daylight, though, patchy sheen and lighter spots are hard to hide.
What should I use to clean stamped concrete patio?
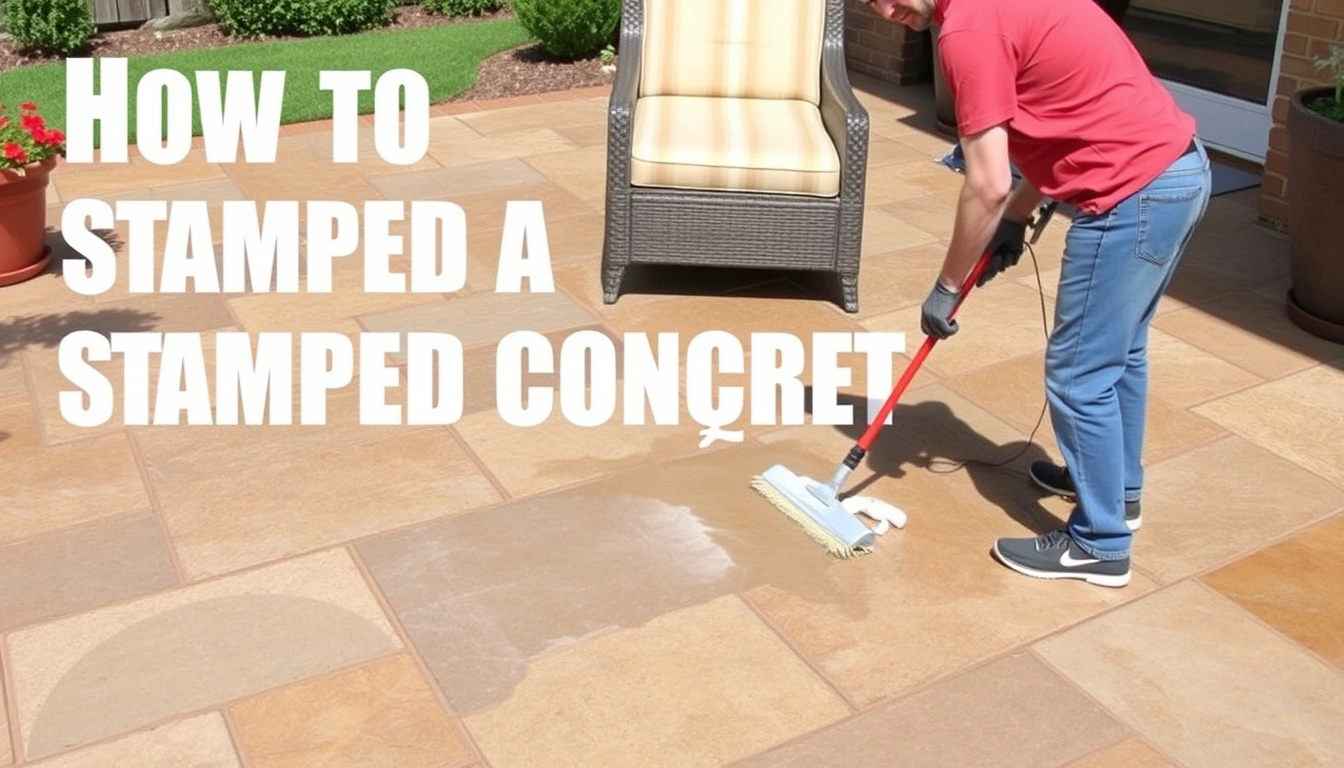
Use the mildest cleaner that gets rid of the soil, not the strongest bottle on the shelf. A pH-neutral cleaner or a few ounces of mild dish soap in a bucket of warm water is often a safe place to start, but always check the product label and the sealer manufacturer’s directions before you use it. For a patio with mildew, a concrete-safe cleaner labeled for decorative concrete is better than bleach in a strong mix.
The target is pretty ordinary: dirt film, pollen, mildew, leaf tannins, and light food spill residue. Those come off with soft agitation, not brute force. Acid cleaners, vinegar, and undiluted bleach are out unless the sealer manufacturer specifically allows them. Acid can etch the surface; bleach can weaken or haze some sealers.
For tools, choose:
- a stiff push broom for dry debris
- a soft or medium nylon deck brush
- a garden hose with a fan nozzle
- a bucket
- a low-pressure washer only if needed, ideally with a wide fan tip and moderate pressure
Buying gear just for one patio changes the equation. A basic concrete-safe cleaner and brushes may cost less than a single service call, but if the patio is large, has intricate joints, or sits on a steep grade, a pro wash may be the better buy because it lowers the chance of finish damage. For related maintenance, see how to clean stamped concrete and concrete sealer types.
What I would not use: wire brushes, abrasive scouring pads, rotary floor scrubbers with aggressive pads, or a turbo nozzle. Those can leave visible swirls, strip sealer unevenly, and make the stamped pattern look worn in patches. Ugly stuff.
How to clean it step by step without stripping the sealer
Start dry, work in a small zone, and keep the cleaner and water moving so nothing dries on the surface. Follow the sequence below and you lower the odds of streaking, hazing, and etching. According to the Portland Cement Association, decorative concrete should be cleaned with methods that avoid harsh abrasion and excessive pressure.
- Sweep the entire patio first. Clear sand, leaves, pine needles, and grit with a stiff broom before any water touches the slab. Verify that joints and texture valleys are clear. If gritty debris stays behind, it turns into sandpaper under the brush and can dull glossy sealer.
- Test the cleaner in a 1-square-foot spot. Mix the cleaner at the label rate or use a few ounces of mild soap in a 1-gallon bucket of warm water. Apply it to a hidden corner and wait 5 to 10 minutes. Verify that the color, gloss, and texture do not change after rinsing. If the test spot turns cloudy, tacky, or lighter, stop and switch products.
- Wet the surface lightly. Use a hose to dampen a section about 50 to 100 square feet at a time. Verify the surface is wet but not flooded. A pre-wet slab helps reduce cleaner streaking and keeps soap from drying into residue. If water beads oddly or darkens in blotches, the sealer may be uneven and you should use less chemical, not more.
- Apply cleaner and dwell briefly. Spread the solution evenly with a watering can, pump sprayer, or bucket. Let it sit 3 to 5 minutes, but do not let it dry. Verify that grime softens, not that the surface foams heavily. If it starts drying, mist it with water. Dry cleaner left on stamped concrete can leave rings.
- Scrub with a nylon brush. Work in overlapping strokes using light to moderate pressure. Focus on corners, texture recesses, and traffic paths. Verify that dirt lifts without changing the sheen. If you feel the brush grabbing hard, the brush is too stiff or the residue is tougher than this method should handle.
- Rinse with low pressure. Use a hose first. If the rinse still leaves residue, use a pressure washer cautiously with a 25-degree or 40-degree fan tip, held at least 12 to 18 inches from the surface. Verify that rinse water carries away dirt rather than cutting visible lines. If you see etching marks, striping, or exposed aggregate, the pressure is too high or the nozzle is too close.
- Check for runoff and pooling at the edges. Push standing water toward a drain, lawn, or gravel strip with a squeegee or broom. Verify no cleaner puddles remain in low spots or stamped joints. If water sits for more than 10 to 15 minutes, it can leave mineral rings and slow drying.
- Let it dry fully before judging the result. Wait several hours, and in humid conditions up to a full day, before deciding whether the patio is clean enough or needs a second pass. Verify the sheen looks even from multiple angles. If one area dries lighter or duller, that is a warning sign of sealer damage, not just dirt.
For most patios, one careful wash is enough. A second pass should be for missed soil, not for “making it brighter.” That mindset is how people overclean decorative concrete.
What are the mistakes that damage stamped concrete?
Too much pressure is the big one. A pressure washer set near 3,000 psi can be fine for some hard surfaces, but stamped concrete with sealer usually does better with much less. Get the tip too close and you can strip sealer, expose the sanded texture unevenly, or leave tiger-striping that jumps out in sunlight. Wider fan tip, more distance, slower rinsing — that is the safer trade-off. For pressure limits and surface care, the Pressure Washing Resource Association and sealer makers typically recommend testing first and using the least force needed.
Second mistake: acidic or harsh alkaline cleaners used without checking compatibility. Acid can etch the surface and attack color, while strong degreasers can haze a sealer or leave a slippery film if not rinsed thoroughly. A concrete-safe, decorative-surface cleaner plus a small test area is the better route.
Third: the wrong scrubber. Wire brushes, green kitchen pads, and aggressive rotary attachments can score the surface and polish only the high points of the pattern. That makes the texture look blotchy. Nylon is the safe middle ground.
Fourth: letting cleaner dry on the slab. Drying leaves residue in the stamped recesses and along control joints. The result is white haze or streaks that look like the patio was cleaned badly, even if the dirt is gone. Work in smaller sections and keep the surface wet until rinsing is done.
Fifth: treating rust, oil, paint, or tire marks like ordinary dirt. They are not. Oil often needs a poultice or specialty cleaner; rust may need a dedicated rust remover; paint can need a different solvent system. If you keep scrubbing a stain that does not respond in one or two passes, you are usually risking the finish for no gain.
When should you stop and call it a different job?
Stop and switch gears when the patio is no longer a routine wash. These are the cases where standard cleaning is the wrong tool:
The sealer is peeling, whitening, or turning tacky: the finish is failing, not just dirty — clean gently only, then plan for stripping and resealing rather than aggressive washing.
You see exposed aggregate or fine sand washing out: the surface layer is already compromised — avoid pressure washing and get a restoration plan, because more water force will widen the damage.
The stain is oil, rust, paint, or fertilizer burn: normal soap will not solve it — use a targeted stain treatment, and if the mark is deep, consult a professional concrete cleaner or restoration contractor, since complete removal may not be realistic without surface repair.
Efflorescence keeps returning after drying: that white mineral film is coming from moisture migration through the slab — cleaning may remove the powder, but the source remains, so repeated washing is wasted effort until drainage or moisture is addressed.
The patio was sealed recently: if the coating is still curing, which can be days rather than hours depending on the product and weather, cleaning too soon can mar the finish — check the label cure window and consult a professional or the sealer manufacturer before washing.
The surface has deep texture or a heavy release pattern: dirt hides in valleys and a careless wash can leave cleaner streaks in high spots — use lower pressure, smaller sections, and more brushing, or hand the job off if the pattern is too intricate to rinse evenly.
Those are not failures of your method; they are signs the surface needs a different fix. On a decorative slab, one bad cleaning session can cost a reseal, and a reseal is far more expensive than a careful wash.
How much does professional cleaning usually cost, and what changes the price?
Professional cleaning usually costs less than restoration, but the quote moves with size, access, and finish condition. I would expect a contractor to quote by square foot or as a minimum service charge, with the final number rising if the patio needs stain treatment, sealing, or hand detailing around walls and planters. Ask for a written estimate and compare it with the manufacturer’s care instructions or the guidance from a local concrete contractor before approving anything.
What changes the price most:
- Square footage. A 200-square-foot patio is a different job from an 800-square-foot one.
- Condition. Light pollen and dust are quick; mildew, oil, or tire marks take longer.
- Access. Tight side yards, no hose bib, or poor drainage slow the work.
- Finish type. High-gloss acrylic sealers demand more care than a matte surface.
- Add-ons. Resealing, joint repair, and spot stain removal can change the quote substantially.
A simple wash may take a few hours for an average patio, but a patio that needs pre-treatment and detailed rinse work can take most of a day. Drying time matters too. If the contractor also seals the surface, that often adds another visit or at least several hours of cure time before foot traffic. Check those timings against the sealer data sheet or the contractor’s instructions before scheduling.
If you are comparing bids, ask what is included: pre-rinse, detergent, stain treatment, low-pressure washing, hand scrubbing, and post-cleaning inspection. A cheap quote that skips prep often costs more later because the finish looks uneven and you end up paying for correction. For help comparing services, see what does concrete sealing cost and stamped concrete maintenance.
What should I ask before I hire someone to clean it?
Ask whether they clean stamped concrete, not just “concrete.” That sounds minor, but it separates a contractor who understands decorative sealer from one who treats every slab like a driveway.
The questions I would ask are:
- What cleaner do you use on sealed decorative concrete?
- What pressure range and nozzle type do you use?
- Do you test in a small spot first?
- How do you handle efflorescence, oil, or rust if you find it?
- Will you protect nearby landscaping and runoff areas?
- If the sealer is failing, will you stop and explain the options before continuing?
A good answer mentions low pressure, test spots, and finish protection. A bad answer sounds like “we just blast it clean.” That phrase usually means the finish is going to pay the price.
I’d also ask how long the patio needs to stay dry afterward if sealing is included. Cure times vary by product and weather, and a contractor who cannot explain that clearly is not treating the decorative finish with enough care. The American Concrete Institute and sealer manufacturers both stress following product-specific cure windows.
How do I keep the patio clean longer without a full reseal every season?
Keep grit off the surface, rinse spills early, and avoid the chemicals that shorten sealer life. A quick dry sweep every 1 to 2 weeks in the dusty season does more for appearance than an aggressive wash once a year. If you see leaves, bird droppings, fertilizer, or drink spills, rinse them within a day if you can. Organic stains get harder the longer they sit.
Use outdoor mats at entrances if chairs, grills, or planters sit on the patio. Felt pads under furniture help reduce scuffs on glossy sealer. If your area gets winter de-icing salt, keep it off the patio when possible; repeated salt exposure can aggravate surface wear and make cleaning harder later. In freeze-thaw climates, I’d be more cautious with pressure washing in late fall because water left in tiny surface pores can create problems when temperatures swing near freezing.
A reseal is not something every patio needs on a rigid schedule, but when the surface stops beading water, looks chalky, or wears unevenly in traffic lanes, cleaning alone will not restore the finish.