Last updated: September 10, 2026
Key Takeaways
- Excavate to the designed depth, then compact the soil and base in layers no thicker than 4 inches.
- A common residential patio thickness is 4 inches, with thickened edges where needed.
- Keep foot traffic off for at least 24 to 48 hours, and heavy loads longer, depending on conditions.
- A patio like that is usually 4 inches thick for light residential use, with thicker edges or a thicker base in some situations.
Table of Contents
- Who this applies to, and what has to be true before you worry about cracks
- Why stamped concrete patios crack in the first place
- What a good patio design does before the pour
- How to prevent cracks during installation
- How much does stamped patio crack repair cost, and what changes the price?
- When should you stop trying to “patch it” and call it a bigger problem?
- The mistakes that make stamped patios crack sooner
- What changes in cold climates, clay soil, or around a pool?
Stamped concrete patios crack because concrete shrinks, shifts, and gets pushed around by the ground under it; the mix, placement, tooling, and curing method decide whether those stresses stay tiny or turn into visible cracks. There’s the whole story in one sentence. If you are trying to understand why stamped concrete patios crack and how to prevent it, the real question is not “Can cracks be avoided forever?” It is “Was the slab designed and installed so normal movement stays under control?” That is what I answer here.
Who this applies to, and what has to be true before you worry about cracks
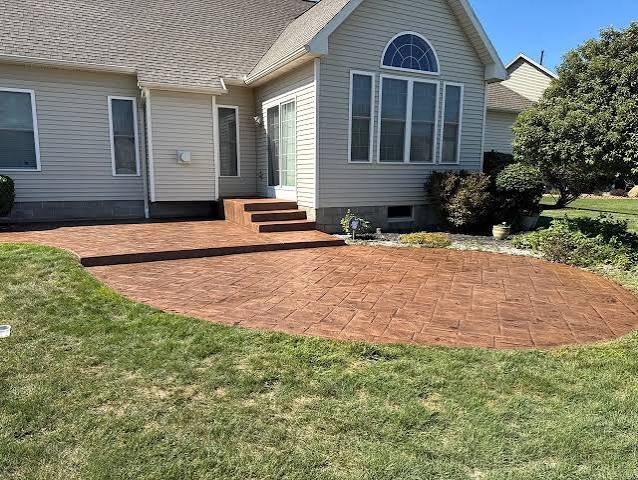
This is for homeowners with a stamped concrete patio, or people planning one, who want to know whether cracking means a bad install or just normal concrete behavior. You probably already know the basic difference between stamped concrete and pavers: stamped concrete is one poured slab with color, release agent, and a texture pattern pressed into the surface. A patio like that is usually 4 inches thick for light residential use, with thicker edges or a thicker base in some situations.
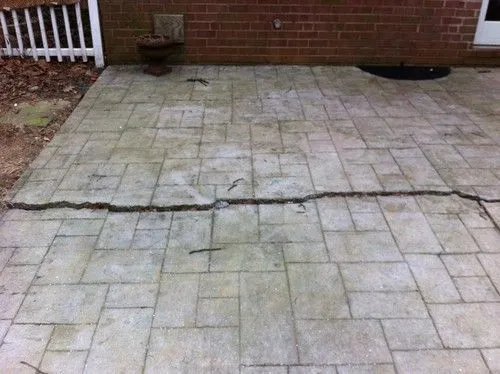
Not every crack means failure. Hairline shrinkage cracks happen in concrete of any kind. Trouble starts when the cracks are wide, uneven, map-like, or show up in the first season because the job was rushed or the site was wrong for concrete in the first place. Pour over poorly compacted fill, expansive clay, a house connection without proper isolation, or extreme heat with no real curing plan — and the odds of movement jump fast. That math stops working quickly.
I would not treat every crack the same way without checking the slab conditions or talking with a qualified concrete professional. A fine crack that stays narrow and does not change much is often mostly cosmetic. A crack with one side higher than the other, a crack that keeps opening, or a slab that has several cracks running in the same direction usually points to settlement, joint issues, or base failure. That is the line between “normal concrete behavior” and “the installation deserves a hard look.” For general guidance on crack causes and repair decisions, see the American Concrete Institute and Penn State Extension. ACI, Penn State Extension.
Cold weather, heavy rain, and clay soil make the margin for error smaller. In those conditions, you need a well-compacted base, drainage away from the slab, and control joints placed with intent. A stamped surface gives you less room to hide bad planning than plain broom-finish concrete does.
Why stamped concrete patios crack in the first place
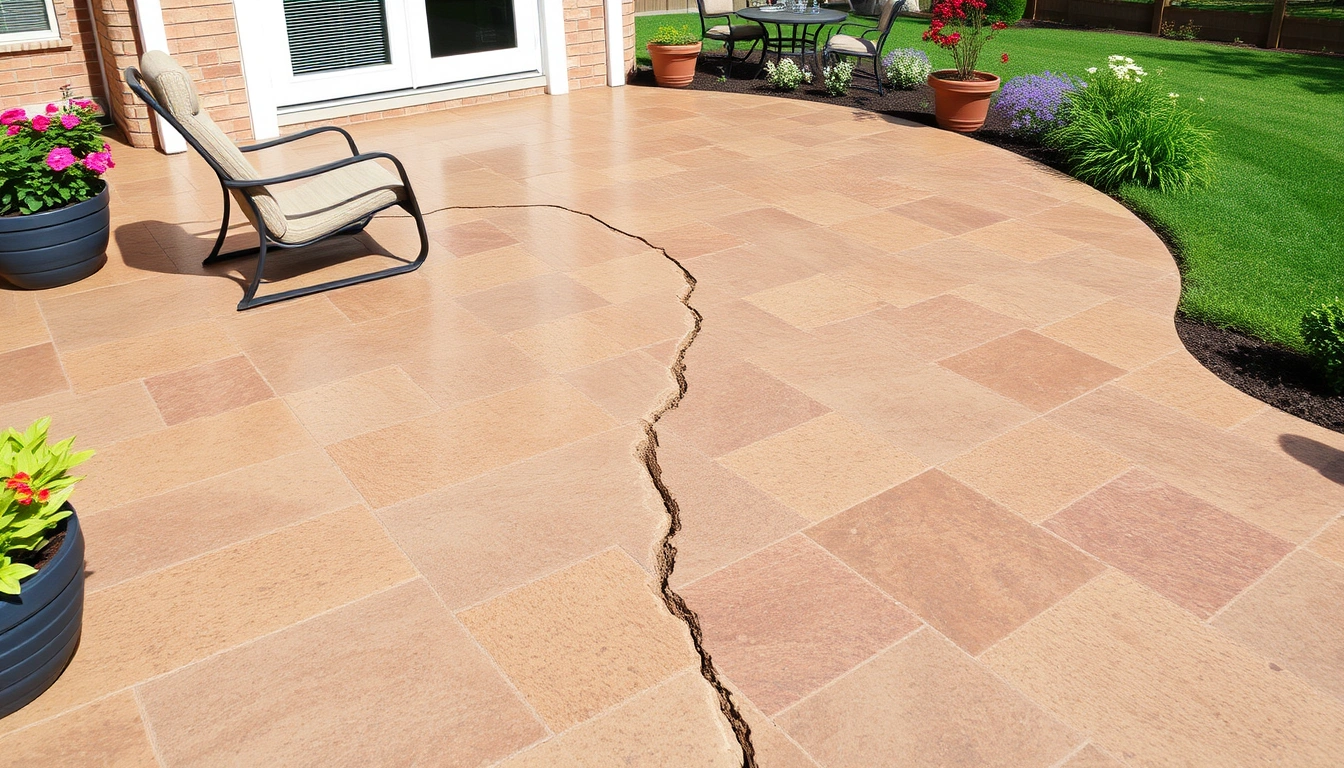
Concrete is strong in compression but weak in tension, so stamped concrete patios crack because the slab bends a little under heat, cold, and soil movement. That is the basic fact behind almost every crack I see discussed in this trade.
Shrinkage comes first. As concrete cures, water leaves the mix and the slab gets smaller, so it should be placed and cured with that in mind; if you are unsure about site conditions or crack patterns, consult a concrete professional. When the slab is restrained by the house, a step, a drain, or a thick spot in the base, the stress has to go somewhere. It often shows up as a crack. This is why control joints matter. A control joint is a planned groove, usually about one-quarter the slab thickness, that encourages the concrete to crack where the installer wants it to crack. For a 4-inch patio, that usually means a sawcut or tooled joint around 1 inch deep, placed at logical intervals and at changes in shape. For general shrinkage and joint guidance, see Portland Cement Association and ACI. PCA, ACI.
Bad subgrade is another culprit. Subgrade is the soil or prepared fill under the base. If it is loose, wet, frozen, or unevenly compacted, the slab settles in one spot and cracks over that weak area. A patio on clay soil that swells when wet and shrinks when dry can move even more. In those areas, the base and drainage matter as much as the concrete itself. The National Concrete Masonry Association also notes that support and drainage are key to performance. NCMA.
Poor water management does damage too. Downspouts that dump next to the patio, soil that slopes back toward the slab, or sprinklers that keep one side wetter than the other create uneven movement. Concrete does not like uneven support. A 1/8-inch drop at one corner may not sound like much, but across a wide slab it becomes a stress point.
Timing can ruin the finish. If stamping starts too late, the surface gets torn and weakened. If finishing starts too early, bleed water gets trapped and the top layer becomes fragile. Hot, windy weather can shorten the working time to less than an hour in some cases, which leaves little room for error. A good installer plans for that with proper crew size, admixtures if needed, and control over timing.
Shape matters too. Long, skinny patio runs, sharp inside corners, and slabs locked against other structures crack more easily. A U-shaped patio with no joints at the corners is almost asking for a crack to bridge that corner.
What a good patio design does before the pour
A good stamped patio design gives concrete somewhere to move without tearing itself apart. That starts with the site and ends with the joint plan.
The base should be compacted in lifts, not dumped in one loose layer. I would expect a contractor to talk about 4-inch lifts for compacted base material, not just “we’ll spread some gravel.” Depending on the soil and climate, the base might be 4 to 6 inches of compacted crushed stone under a residential patio. On weak soil or in freeze-thaw areas, more preparation may be needed. If a bid never mentions base thickness, drainage, or compaction, that is a warning sign.
Drainage should send water away from the slab, usually with at least a slight slope away from the house. A common target is about 1/8 to 1/4 inch per foot, though local conditions and access can change that. Flat patios hold water. Water under the slab weakens support, and water on top gets into small cracks and makes them worse during freezing weather.
Joint placement should follow the slab shape, not just a neat square pattern. I look for joints at corners, re-entrant angles, and changes in width. If a patio has an L-shape, the inside corner often needs special attention because that point concentrates stress. A sawcut placed too late or too shallow often fails to control the crack, and then the slab cracks wherever it wants.
Reinforcement helps the slab hold together after a crack forms, but it does not stop cracking by itself. Fiber reinforcement can help with plastic shrinkage, and rebar or wire mesh can help with load distribution, but neither replaces a good base and joint layout. If a contractor sells reinforcement as a magic fix, that is wrong. The concrete still needs room to move in controlled ways.
How to prevent cracks during installation
You prevent most stamped patio cracks by controlling water, timing, thickness, and movement from the first shovel of base material to the last day of curing.
- Prepare the subgrade to a consistent elevation. Excavate to the designed depth, then compact the soil and base in layers no thicker than 4 inches. Verify with a hand tamp or plate compactor and a level line across the pad. A soft spot that sinks underfoot means the slab will settle later.
- Build the right base thickness for the soil. Place 4 to 6 inches of compacted crushed stone for a typical patio, more if the soil is weak or drainage is poor. Verify that the base is firm, even, and drains freely. If the base pumps water when stepped on, that is a failure point.
- Keep slab thickness uniform. A common residential patio thickness is 4 inches, with thickened edges where needed. Verify there are no feathered edges or sudden thickness changes. Thin spots crack first, especially near steps and borders.
- Use a workable mix, not an overly wet one. The mix should be plastic enough to place and finish, but not soupy. Verify that water is not added on site just to make it easier to place. Excess water raises shrinkage and weakens the surface; a dusty, weak top layer is the warning sign.
- Place and stamp on the right schedule. Stamp when the concrete supports the tools without losing the pattern, usually within a narrow window after placement that depends on weather and mix design. Verify the pattern is crisp, not smeared, and the surface is not tearing. If the crew is chasing the slab because it set too fast, the stamp work will suffer.
- Cut or tool control joints at the right depth. For a 4-inch slab, target about 1 inch deep, and place joints so panel sizes are not random long rectangles. Verify joints line up with corners and shape changes. A joint that looks decorative but is too shallow is not doing its job.
- Cure the slab instead of letting it dry out. Keep moisture in the slab for at least several days using a curing compound or covered curing method approved for stamped finishes, and if the project conditions are unusual, consult the sealer or mix manufacturer and a concrete professional. Verify the surface does not dry too fast in sun or wind. Rapid drying is a common cause of early shrinkage cracks and weak color consistency. For curing guidance, see ACI and the Portland Cement Association. [ACI](https://www.concrete.org/), [PCA](https://www.cement.org/).
- Protect the fresh surface from traffic and water. Keep foot traffic off for at least 24 to 48 hours, and heavy loads longer, depending on conditions. Verify no hoses, lawn equipment, or furniture sit on the slab while it is still green. Early loading can leave permanent stress marks or edge damage.
A small patio can often be poured and stamped in a day, but curing takes much longer than the crew’s visit. Light foot traffic may be allowed in 1 to 2 days, while sealing is usually delayed until the slab is dry enough, often after a longer curing period. If a contractor acts as though the job is done when the stamp mats come off, I would treat that as a bad sign and ask for the curing plan in writing, or consult another concrete contractor. ACI.
How much does stamped patio crack repair cost, and what changes the price?
Stamped patio crack repair can be inexpensive for a hairline crack and expensive when the crack reflects deeper slab movement. The cost depends on crack width, whether one side has settled, whether color needs to be blended, and whether the repair must be hidden under a new texture and sealer.
A simple flexible sealant or routed crack fill may be the least expensive option when the crack is stable and narrow. That works for cosmetic control, not for a slab that is moving. If the crack is wider, an epoxy or polyurethane repair may be used, but those materials can look obvious on stamped surfaces unless they are integrated carefully. When the slab has settled, mudjacking or slab lifting may be part of the fix, though that only helps if the support below can be corrected.
Stamped concrete is harder to patch invisibly than plain concrete because the repair has to respect the pattern and color. A sawcut, re-stamp, recolor, and reseal sequence can improve appearance, but it is labor-heavy. In many cases, the honest answer is that a perfect cosmetic repair is not realistic. If a contractor promises a repaired stamped crack will disappear completely, I would ask how they plan to match the release pattern, antiquing, and sealer sheen.
If you are collecting bids, ask what the price includes: crack routing, flexible filler, color hardener touch-up, stain, reseal, or structural correction under the slab. A low price that only covers caulk may solve one season’s water intrusion and not the movement underneath.
When should you stop trying to “patch it” and call it a bigger problem?
You should stop treating a stamped patio crack as a simple patch job when the crack shows movement, settlement, or repeated failure. That is the point where surface repair stops being the right tool, and a qualified concrete professional should evaluate the slab.
A crack is wider than about 1/4 inch: it usually means more than cosmetic shrinkage — get the slab evaluated for movement and expect a repair that addresses the base, not just the surface.
One side of the crack is higher than the other: that is differential settlement — patching the top will fail again unless the support below is corrected.
Cracks form in a cluster or a stair-step pattern: that often points to subgrade movement or poor joint placement — ask for an inspection of drainage, base compaction, and panel layout.
Cracking appeared in the first season after installation: early failure usually means the mix, curing, or base preparation was off — the installer should explain the cause before any cosmetic repair is sold.
The patio pitches toward the house or holds standing water: water is feeding the problem — fix drainage first or the crack repair will not last.
Edges are spalling or flaking along with the crack: the surface paste has been weakened, often by overwatering, freeze-thaw, or salt exposure — a patch may look better for a while, but the slab has a deeper durability problem.
The mistakes that make stamped patios crack sooner
The biggest mistake is assuming the stamp pattern matters more than the slab itself. It does not. A beautiful pattern on a weak base still cracks.
One common error is using too much water in the mix to make finishing easier. The consequence is higher shrinkage, weaker paste, and a surface that chips or cracks sooner. The better choice is a properly designed mix and enough crew to place it on time.
Another error is skipping joints or cutting them too late. That forces random cracking, often through the middle of a decorative field or across a clean border. The alternative is planned joint placement at the right depth and in the right locations before the slab has a chance to choose its own crack line.
A third mistake is pouring over a base that was never compacted in layers. The slab may look fine for months, then one corner drops. The fix is to build the base in lifts, compact each lift, and reject soft spots before concrete arrives.
A fourth mistake is sealing too soon or using a sealer that locks in moisture. That can trap water and affect color or curing. Since sealers vary, follow the sealer manufacturer’s guidance and make sure the slab has cured and dried enough for the product you choose.
A fifth mistake is treating edge cracks and corner cracks as “just cosmetic.” Those are often the places where movement concentrates first. If a corner is opening, the patio shape or support may be working against you.
What changes in cold climates, clay soil, or around a pool?
Cold climates, clay soil, and pool decks all change the details enough that a one-size answer is wrong.
In cold weather, freeze-thaw cycles can widen small cracks and make surface scaling worse if water enters and expands. That makes drainage and sealing more important. In clay soil, shrink-swell movement can lift one part of the slab and leave another part behind. Around a pool, splash water, hose runoff, and wet footprints make moisture management part of the crack-prevention plan.
Because of that, the best stamped patio crack prevention strategy is not one trick. It is a chain: stable subgrade, well-compacted base, right thickness, honest joint layout, careful placement, and proper curing. Break one link, and the slab usually complains sooner or later.
If you are planning a new patio and want to avoid the usual failure points, ask for the base thickness, joint plan, curing method, and sealer schedule before the first truck arrives. For why stamped concrete patios crack and how to prevent it, the details matter more than the decorative finish.